图片/图形
炫酷coming soon分步显示动画特效
 PetitQ
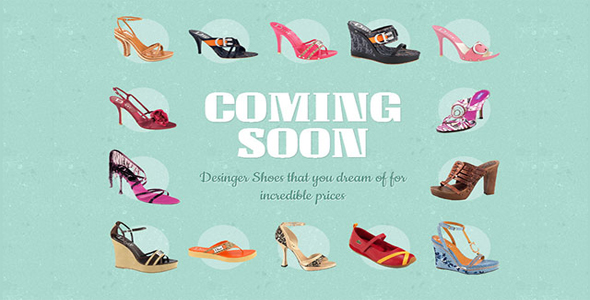
这是一款效果十分炫酷的 css3 coming soon 分步显示动画特效。整个 css3 动画分几个场景,每次显示一个场景,就像广告里经常出现的 coming soon 分步显示效果。
html 结构
创建一个 class 为 sp-container 的 div 作为包裹容器。在其中 sp-content 为主要显示区域,里面包含多个 sp-row。每一个 sp-row 是一个“动画场景”,里面放置各种图片。sp-side 是最后显示的提交表单。
也想出现在这里?联系我们吧

<div class="sp-container">
<div class="sp-content">
<div class="sp-row">
<span><img src="images/example1/1.png" /></span>
<span><img src="images/example1/2.png" /></span>
<span><img src="images/example1/3.png" /></span>
<span><img src="images/example1/4.png" /></span>
<span><img src="images/example1/5.png" /></span>
</div>
<div class="sp-row sp-side-row">
<span><img src="images/example1/11.png" /></span>
<span><img src="images/example1/12.png" /></span>
</div>
<div class="sp-row sp-content-row">
<h1>Coming Soon</h1>
<h2>Designer Shoes that you dream of for incredible prices</h2>
<h1 class="sp-title"><em>Little</em> Blue Shoe</h1>
</div>
<div class="sp-row sp-side-row">
<span><img src="images/example1/13.png" /></span>
<span><img src="images/example1/14.png" /></span>
</div>
<div class="sp-row">
<span><img src="images/example1/6.png" /></span>
<span><img src="images/example1/7.png" /></span>
<span><img src="images/example1/8.png" /></span>
<span><img src="images/example1/9.png" /></span>
<span><img src="images/example1/10.png" /></span>
</div>
<div class="sp-arrow"></div>
</div>
<div class="sp-side">
<h2>Be the first to know:</h2>
<div class="sp-input">
<input type="text" value="Your email"/>
<a href="index.html">Go</a>
</div>
</div>
</div>
CSS 样式
这个 demo 的主要思想是制作一系列的场景动画:
1、所有商品的缩略图依次出现
2、h1 标题出现
3、h2 子标题出现
4、h1 和 h2 子标题 fadeOut 消失
5、商品缩略图依次以 fadeOut 的方式消失。第二个 h1 标题以 fadeInColor 的方式出现。内容区域移到左边并以 sizeDownMove 方式缩小
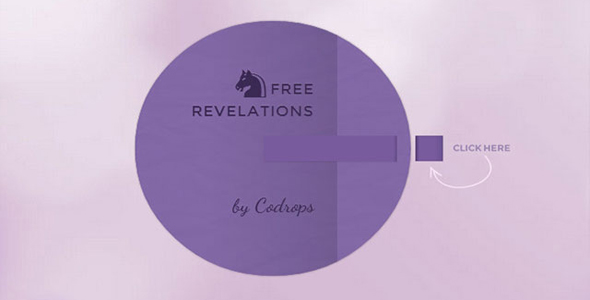
6、箭头和提交表单以 slideIn 的方式出现
下面开始写 css 代码:主内容区域居中并设置为绝对定位:
.sp-container {
position: relative;
width: 1000px;
height: 600px;
margin: -40px auto 0 auto;
}.sp-content {
position: absolute;
z-index: 100;
width: 800px;
height: 600px;
left: 0px;
top: 0px;
animation: sizeDownMove 0.9s ease-in-out 6s backwards;
transform: scale(0.6);
transform-origin: 0% 50%;
}
从上面的代码可以看到,主内容区域在 6 秒后移到左侧并缩小。将箭头也居中,并给它一张背景图片:
.sp-arrow {
background: transparent url(../images/arrow.png) no-repeat top left;
position: absolute;
top: 50%;
margin-top: -77px;
left: 82%;
width: 198px;
height: 155px;
animation: slideIn 0.6s ease-in-out 6s backwards;
z-index: 100;
}
在 side 中的元素包括一个 email 提交表单,将它放置到右边:
.sp-side {
width: 460px;
height: 300px;
position: absolute;
right: 10px;
top: 25%;
animation: slideIn 0.6s ease-in-out 6s backwards;
}
下面给标题一些样式:
.sp-side h2 {
font-size: 70px;
padding: 20px 0px;
text-align: center;
color: #fff;
text-transform: uppercase;
text-shadow: 1px 1px 2px rgba(0,0,0,0.2);
font-family: 'Unlock', Arial, sans-serif;
}
提交按钮的样式如下:
.sp-input {
background-color: rgba(255,255,255,0.3);
height: 30px;
padding: 20px;
border-radius: 10px;
margin: 0 auto;
width: 260px;
}.sp-input input[type="text"] {
width: 210px;
padding: 6px;
background-color: #fff;
border: 1px solid #ddd;
border-radius: 4px;
float: left;
font-family: 'Cookie', serif;
font-size: 18px;
}.sp-input input[type="text"]:focus {
outline-color: #acdacf;
}.sp-input a {
float: left;
background-color: #418e7b;
color: #fff;
width: 30px;
height: 30px;
border: none;
border-radius: 50%;
margin-left: 5px;
text-align: center;
line-height: 30px;
cursor: pointer;
font-family: 'Unlock', Arial, sans-serif;
}.sp-input a:hover {
background-color: #fff;
color: #418e7b;
}
现在来看一下主内容区域的样式:首先给标题样式,它将在图片显示后显示,然后消失:
.sp-content h1:first-child {
font-size: 100px;
text-align: center;
color: #fff;
text-transform: uppercase;
text-shadow: 1px 1px 2px rgba(0,0,0,0.2);
line-height: 80px;
padding: 30px 0px 20px 0px;
font-family: 'Unlock', Arial, sans-serif;
animation:
fromBack 1.2s ease-in-out 1.5s backwards,
fadeOut 0.5s linear 4.5s forwards;
}
h2 标题在 h1 标题之后出现,然后和 H1 标题一起消失:
.sp-content h1.sp-title {
font-size: 90px;
line-height: 80px;
position: absolute;
top: 50px;
left: 160px;
width: 470px;
border-radius: 50%;
background-color: rgba(255, 255, 255, 0.3);
padding-top: 155px;
height: 305px;
text-transform: uppercase;
text-align: center;
color: #518f7e;
text-shadow: 1px 1px 1px rgba(255,255,255,0.9);
font-family: 'Unlock', Arial, sans-serif;
animation: fadeInColor 1.2s linear 5.2s backwards;
}.sp-content h1:last-child em {
font-family: 'Cookie', serif;
text-transform: none;
}.sp-content h2 {
font-size: 36px;
text-align: center;
color: #518f7e;
font-family: 'Cookie', serif;
text-shadow: 1px 1px 1px rgba(255,255,255,0.9);
opacity: 0;
animation:
fromBack 0.6s ease-in-out 2.6s backwards,
fadeOut 0.5s linear 4.5s backwards;
}
最后来给商品缩略图样式:
.sp-content-row {
width: 466px;
height: 300px;
float: left;
}.sp-side-row {
width: 150px;
float: left;
}.sp-row img {
display: block;
z-index: 1000;
position: relative;
}
每一个商品缩略图将从大小为 0 被放大到 1,并依次出现。之后消失时效果刚好相反。
.sp-row span {
position: relative;
float: left;
margin: 2px;
z-index: 100;
transform: scale(1);
opacity: 0;
animation:
fromBack 0.4s linear backwards,
fadeOut 0.3s linear backwards;
}
我们通过指定一些时间延时来制作缩略图依次出现的效果:
.sp-row:nth-child(1) span:nth-child(1) {
animation-delay: 0s, 5s;
}.sp-row:nth-child(1) span:nth-child(2) {
animation-delay: 0.1s, 5.1s;
}.sp-row:nth-child(1) span:nth-child(3) {
animation-delay: 0.2s, 5.2s;
}.sp-row:nth-child(1) span:nth-child(4) {
animation-delay: 0.3s, 5.3s;
}.sp-row:nth-child(1) span:nth-child(5) {
animation-delay: 0.4s, 5.4s;
}.sp-row:nth-child(4) span:nth-child(1) {
animation-delay: 0.5s, 5.5s;
}.sp-row:nth-child(4) span:nth-child(2) {
animation-delay: 0.6s, 5.6s;
}.sp-row:nth-child(5) span:nth-child(5) {
animation-delay: 0.7s, 5.7s;
}.sp-row:nth-child(5) span:nth-child(4) {
animation-delay: 0.8s, 5.8s;
}.sp-row:nth-child(5) span:nth-child(3) {
animation-delay: 0.9s, 5.9s;
}.sp-row:nth-child(5) span:nth-child(2) {
animation-delay: 1s, 6s;
}.sp-row:nth-child(5) span:nth-child(1) {
animation-delay: 1.1s, 6.1s;
}.sp-row:nth-child(2) span:nth-child(2) {
animation-delay: 1.2s, 6.2s;
}.sp-row:nth-child(2) span:nth-child(1) {
animation-delay: 1.3s, 6.3s;
}
使用伪元素为每个缩略图制作一个圆形的背景:
.sp-row span:before {
content: '';
position: absolute;
background-color: rgba(255,255,255,0.3);
width: 100px;
height: 100px;
top: 50%;
left: 50%;
margin: -50px 0 0 -50px;
border-radius: 50%;
}
下面是动画效果的制作,第一个动画效果是 fadeOut 效果,通过设置透明度从 1 到 0 来实现:
@keyframes fadeOut{
0%{
opacity: 1;
}100%{
opacity: 0;
}}
第二个动画效果是 fadeInColor,它将使元素 fade in 并改变背景色。
@keyframes fadeInColor{
0%{
opacity: 0;
background-color: rgba(255,255,255,0);
}50%{
opacity: 0.5;
background-color: rgba(255,255,255,0);
}100%{
opacity: 1;
background-color: rgba(255,255,255,0.3);
}}
第三个动画效果是 slideIn,它将简单的使元素移动到左侧:
@keyframes slideIn{
0%{
opacity: 0;
transform: translateX(-200px);
}100%{
opacity: 1;
transform: translateX(0px);
}}
第四个动画效果是 sizeDownMove,它将使元素缩小并从左边 100 像素移动到 0 像素。
@keyframes sizeDownMove{
0%{
transform: scale(1);
left: 100px;
}100%{
transform: scale(0.6);
left: 0px;
}}
最后一个动画效果是 fromBack,它将使元素的大小从 0 放大到 1 同时透明度从 0 增大到 1。
@keyframes fromBack{
0%{
transform: scale(0);
opacity: 0;
}100%{
transform: scale(1);
opacity: 1;
}}
| 演示地址 | 下载地址 |
专业提供WordPress主题安装、深度汉化、加速优化等各类网站建设服务,详询在线客服!
也想出现在这里?联系我们吧