图片/图形
jQuery+CSS3超逼真图片放大镜特效
 PetitQ
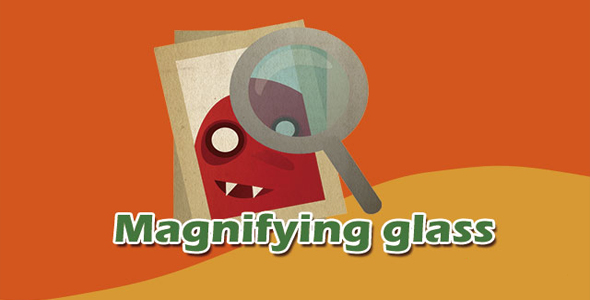
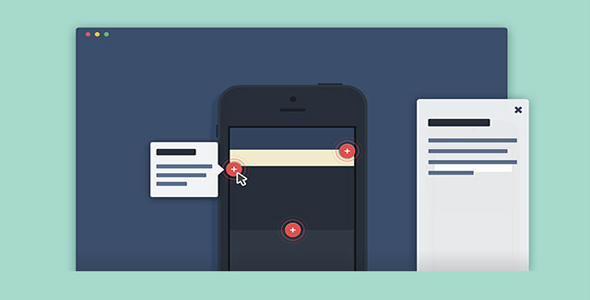
这是一款效果非常逼真的 jQuery 和 CSS3 超逼真的图片放大镜特效。该图片放大镜特效使用 CSS3 的 box-shadow 和 border-radius 实现来制作放大镜的样式,使用 jQuery 来获取当前鼠标的坐标系,并修改当前坐标系的背景图像。
HTML 结构
这个图片放大镜特效的 HTML 结构非常简单,使用一个 class 为 magnify 的 div 作为 wrapper,里面缩略图直接使用<img>来制作,原图使用一个 class 为 large 的 div 制作。
也想出现在这里?联系我们吧

<div class="magnify">
<!-- This is the magnifying glass which will contain the original/large version -->
<div class="large"></div>
<!-- This is the small image -->
<img class="small" src="img/iphone.jpg" width="200"/>
</div>
CSS 样式
CSS 样式主要是设置放大镜的外观样式,使用 box-shadow 和 border-radius 来实现。为制作放大镜的圆形边框,使用了多重阴影技术。
/*Lets create the magnifying glass*/.large {
width: 175px; height: 175px;
position: absolute;
border-radius: 100%;
/*Multiple box shadows to achieve the glass effect*/box-shadow: 0 0 0 7px rgba(255, 255, 255, 0.85),
0 0 7px 7px rgba(0, 0, 0, 0.25),
inset 0 0 40px 2px rgba(0, 0, 0, 0.25);
/*Lets load up the large image first*/background: url('img/iphone.jpg') no-repeat;
/*hide the glass by default*/display: none;
}
JAVASCRIPT
该图片放大镜特效在插件初始化的时候,会先计算缩略图的原始尺寸,在获取缩略图的原始尺寸之后,才开始放大图片。在获取缩略图的尺寸的时候,插件会创建一个和.small 属性一样的 Image 对象。我们不能直接获取.small 的尺寸大小,因为它的 width 属性设置为 200 像素,我们不知道它的高度,为了获取它的实际尺寸,只有新建一个 Image 对象。
if(!native_width && !native_height)
{//This will create a new image object with the same image as that in .small//We cannot directly get the dimensions from .small because of the//width specified to 200px in the html. To get the actual dimensions we have//created this image object.var image_object = new Image();
image_object.src = $(".small").attr("src");
//This code is wrapped in the .load function which is important.//width and height of the object would return 0 if accessed before//the image gets loaded.native_width = image_object.width;
native_height = image_object.height;
}
在获取缩略图的正确尺寸之后,然后获取鼠标在缩略图上的偏移位置 mx 和 my。当鼠标在图片内时,.large 被设置为可见状态,然后通过一个小公式来获取鼠标在缩略图上的坐标对应的在大图上的坐标。最后使用 css()方法来修改放大镜的坐标和背景位置。
else{//x/y coordinates of the mouse//This is the position of .magnify with respect to the document.var magnify_offset = $(this).offset();
//We will deduct the positions of .magnify from the mouse positions with//respect to the document to get the mouse positions with respect to the//container(.magnify)var mx = e.pageX - magnify_offset.left;
var my = e.pageY - magnify_offset.top;
//Finally the code to fade out the glass if the mouse is outside the containerif(mx < $(this).width() && my < $(this).height() && mx > 0 && my > 0)
{$(".large").fadeIn(100);
}else{$(".large").fadeOut(100);
}if($(".large").is(":visible"))
{//The background position of .large will be changed according to the position//of the mouse over the .small image. So we will get the ratio of the pixel//under the mouse pointer with respect to the image and use that to position the//large image inside the magnifying glassvar rx = Math.round(mx/$(".small").width()*native_width - $(".large").width()/2)*-1;
var ry = Math.round(my/$(".small").height()*native_height - $(".large").height()/2)*-1;
var bgp = rx + "px " + ry + "px";
//Time to move the magnifying glass with the mousevar px = mx - $(".large").width()/2;
var py = my - $(".large").height()/2;
//Now the glass moves with the mouse//The logic is to deduct half of the glass's width and height from the//mouse coordinates to place it with its center at the mouse coordinates//If you hover on the image now, you should see the magnifying glass in action$(".large").css({left: px, top: py, backgroundPosition: bgp});
}}
| 演示地址 | 下载地址 |
专业提供WordPress主题安装、深度汉化、加速优化等各类网站建设服务,详询在线客服!
也想出现在这里?联系我们吧