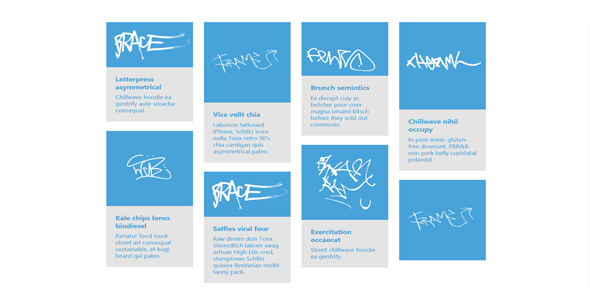

瀑布流
Design Samsung 效果瀑布流插件
 PetitQ
本教程将教大家怎么样实现“Design Samsung”网站上的瀑布流效果。这个效果是先有一个彩色的背景滑出,然后图片再在其上滑出,当向下滚动时,不断有图片被加载的瀑布流效果。如果你曾今访问过 Design Samsung 网站,那么你一定已经见识过这种神奇的效果了。彩色的背景先从左边滑出,随后图片再在其上左边从滑出,彩色的背景代表了图片的主要色彩(某张图片的主导颜色)。这是一个非常有创意的图片懒加载效果,本教程将教你如何使用 Masonry 和 CSS animations 来实现这种效果。
HTML 结构:
我们使用一个 section 来做 wrapper,然后在里面放一个无序列表,给第一个 li 元素添加 class 为 title-box
也想出现在这里?联系我们吧

<section class="grid-wrap">
<ul class="grid swipe-right" id="grid">
<li class="title-box">
<h2>Illustrations by <a href="http://ryotakemasa.com/">Ryo Takemasa</a></h2>
</li>
<li><a href="#"><img src="img/1.jpg" alt="img01"><h3>Kenpo News April 2014 issue</h3></a></li>
<li><a href="#"><img src="img/2.jpg" alt="img02"><h3>SQUET April 2014 issue</h3></a></li>
<li><!-- ... --></li>
<!-- ... -->
</ul>
</section>
每一个 li 元素都包含一张图片和一个标题。注意:我们将使用 swipe-right、swipe-down 和 swipe-rotate 中的一个样式来控制无序列表的运动。当页面加载后,我们希望那些可视区域内的图片已经被加载,然后当我们滚动鼠标的时候,希望图片能以懒加载的形式被加载。这些将靠 animate 属性来实现。最开始可视区域的元素我们给定 shown 样式,这样,它们将不会懒加载。彩色的背景需要添加动态效果,我们在标题之后添加一个 div,并在其中加入一个 a 标签,给这个 div 添加 classcurtain,然后使用 ColorFinder.js 将它的背景色设置为图片的主导色。
CSS 样式:
首先,我们需要设置 wrapper 的最大宽度,设置为 1260px(这样方便我们在每一行中添加 4 张图片)
.grid-wrap {
clear: both;
margin: 0 auto;
padding: 0;
max-width: 1260px;
}
无序列表要居中放置,并去掉它的原始样式。
.grid {
margin: 30px auto;
padding: 0;
min-height: 500px;
list-style: none;
}
我们希望用 javascript 来控制 Loadding 图片是否可见,我们使用 loaded 来控制它,当图片加载完成后,添加 loaded 样式。
.js .grid {
background: url(../img/loading.gif) no-repeat 50% 100px;
}.js .grid.loaded {
background: none;
}
这样做的目的的在图片加载完成之前不显示任何东西。每一个 li 都需要左浮动,宽设置为 314px(图片的宽度加上 a 元素的 margin)。
.grid li {
display: inline-block;
overflow: hidden;
width: 314px;
text-align: left;
vertical-align: top;
}.js .grid li {
display: none;
float: left;
}.js .grid.loaded li {
display: block;
}
接下来给标题添加一些样式:
.title-box h2 {
display: block;
margin: 7px;
padding: 20px;
background: #2E3444;
color: #D3EEE2;
text-transform: uppercase;
letter-spacing: 1px;
font-weight: 300;
}.title-box h2 a {
display: block;
font-weight: 900;
}.title-box h2 a:hover {
color: #D3EEE2;
}
为 a 元素和图片添加样式:
.grid li > a,
.grid li img {
display: block;
outline: none;
border: none;
}
为了不让彩色的背景超出界限,需要给 a 元素添加 overflow:hidden
.grid li > a {
position: relative;
overflow: hidden;
margin: 7px;
}
curtain 需要绝对定位,并设置为 100%宽和 100%高。
.grid .curtain {
position: absolute;
top: 0;
left: 0;
width: 100%;
height: 100%;
background: #96cdc8;
}
为了使效果正常,curtain 必须在图片和标题之上。我们要做的三种效果分别使 curtain 从左边、上边和从左边旋转展开。
.grid.swipe-right .curtain {
transform: translate3d(-100%,0,0);
}.grid.swipe-down .curtain {
transform: translate3d(0,-100%,0);
}.grid.swipe-rotate .curtain {
width: 200%;
height: 200%;
transform: rotate3d(0,0,1,90deg);
transform-origin: top left;
}
另外,我们在 curtain 上使用伪元素为图片添加一些阴影效果。
.grid .curtain::after {
position: absolute;
top: 0;
left: 0;
width: 100%;
height: 100%;
background: rgba(0,0,0,1);
content: '';
}.grid.swipe-right .curtain::after,
.grid.swipe-rotate .curtain::after {
left: -100%;
}.grid.swipe-down .curtain::after {
top: -100%;
}
给标题添加一个较深的背景色,并使它绝对定位。
.grid li h3 {
position: absolute;
bottom: 0;
left: 0;
margin: 0;
padding: 20px;
width: 100%;
background: #2E3444;
color: #D3EEE2;
text-align: right;
text-transform: uppercase;
letter-spacing: 1px;
font-weight: 800;
font-size: 1em;
transition: transform 0.2s, color 0.2s;
}
我们使用 a 元素的::before 伪元素来做鼠标划过图片的效果。把它设置为绝对定位,当鼠标划过时,边框将产生运动效果。标题将向上移动一些,并且颜色会有所变化。
.grid li > a::before {
position: absolute;
top: 0;
left: 0;
width: 100%;
height: 100.5%;
border: 0px solid transparent;
background: transparent;
content: '';
transition: border-width 0.2s, border-color 0.2s;
}/* Hover effects */.grid li.shown:hover h3 {
color: #fff;
transform: translate3d(0,-30px,0);
}.grid li.shown:hover > a::before {
border-width: 14px;
border-color: #2E3444;
}
现在,让我们来制作运动效果。前面已经提到过,我们给 curtain 定义了一个“hidden”状态,现在可以加以运用了。当我们滚动页面时,我们将给它添加 class animate 来触发运动。为了达到正确的效果,我们先让 curtain translate 到 0,使它从左边运动到中间,然后在使它 translate 到右边。通过设置 translate 从 0 到 50%再到 60%,来确保它每次只增长一点,而不是一下就从左边增长到右边。
/* Swipe right */.grid.swipe-right li.animate .curtain {
animation: swipeRight 1.5s cubic-bezier(0.6,0,0.4,1) forwards;
}@keyframes swipeRight {
50%, 60% { transform: translate(0); }
100% { transform: translate3d(100%,0,0); }
}
(为什么这里需要 translate(0)?因为某些浏览器,比如 IE11 貌似在这个例子中使用 translate3d(0,0,0)会有些问题。)向下运动的效果类似,我们需要调整的是 Y 轴而不是 X 轴。
/* Swipe down */.grid.swipe-down li.animate .curtain {
animation: swipeDown 1.5s cubic-bezier(0.6,0,0.4,1) forwards;
}@keyframes swipeDown {
50%, 60% { transform: translate(0); }
100% { transform: translate3d(0,-100%,0); }
}
同样,旋转效果我们只需要 rotate 它既可。
/* Swipe rotate */.grid.swipe-rotate li.animate .curtain {
animation: swipeRotate 1.5s ease forwards;
}@keyframes swipeRotate {
50%, 60% { transform: rotate3d(0,0,1,0deg); }
100% { transform: rotate3d(0,0,1,-90deg); }
}
阴影的淡入淡出效果只是简单的改变 curtain 的伪元素的透明度。
.grid li.animate .curtain::after {
animation: fadeOut 1.5s ease forwards;
animation-delay: inherit;
}@keyframes fadeOut {
50%, 60% { opacity: 1; }
100% { opacity: 0; }
}
当我们使用 js 来控制运动的间隔时间时,需要确保伪元素和它的父元素的值相同。这里我们设置 animation-delay 为 inherit。最后,我们需要隐藏图片和标题,直到它运动到 60%时才显示出来。通过使用 step-end(它等效于 steps(1, end)),我们能够正确的控制时间。
.js .grid li img,
.js .grid li h3 {
visibility: hidden;
}.grid li.animate img,
.grid li.animate h3 {
animation: showMe 1.5s step-end forwards;
}@keyframes showMe {
from { visibility: hidden; }
60%, 100% { visibility: visible; }
}.grid li.shown img,
.grid li.shown h3 {
visibility: visible;
}
Javascript 部分:
当我们滚动鼠标时,我们需要做什么呢?我们需要一种懒加载的效果,最开始出现的图片我们不希望它们有动画效果,我们还需要获取图片的主导色来填充背景。现在开始写 js 代码。minDelay 和 maxDelay 用来定义动画的延迟时间的范围。这将使每张图片的动画时间略有不同,从而是整体效果更佳。如果你想使图片在同一时间开始运动,可以将 maxDelay 调整为 0。viewportFactor 定义了有多少将被触发动画的图片出现。0(0%)表示当图片显示在屏幕中的时候就触发动画,1(100%)表示图片在屏幕中加载完毕才触发动画。
GridScrollFx.prototype.options = {
minDelay : 0,
maxDelay : 500,
viewportFactor : 0
}
现在来初始化一些参数,同时初始化 Masonry。为了使 Masonry 能够正常工作,我们需要预加载图片。接着我们需要区分屏幕上的图片那些是已经加载好的,已经加载好的图片我们需要添加上 class shown 使它们可见。对那些不在屏幕中的图片,我们要添加 curtain,这样当它们滚动到屏幕显示区域时,将产生动画效果。我们还要为所有的图片添加动画延迟。最后,我们为 window 绑定 scroll 和 resize 事件。具体代码如下:
GridScrollFx.prototype._init = function() {
var self = this, items = [];
[].slice.call( this.el.children ).forEach( function( el, i ) {
var item = new GridItem( el );
items.push( item );
} );
this.items = items;
this.itemsCount = this.items.length;
this.itemsRenderedCount = 0;
this.didScroll = false;
imagesLoaded( this.el, function() {
// show gridself.el.style.display = 'block';
// initialize masonrynew Masonry( self.el, {
itemSelector : 'li',
isFitWidth : true,
transitionDuration : 0
} );
// the items already shown...self.items.forEach( function( item ) {
if( inViewport( item.el ) ) {
++self.itemsRenderedCount;
classie.add( item.el, 'shown' );
}else {
item.addCurtain();
// add random delayitem.changeAnimationDelay( Math.random() * ( self.options.maxDelay - self.options.minDelay ) + self.options.minDelay );
}} );
var onScrollFn = function() {
if( !self.didScroll ) {
self.didScroll = true;
setTimeout( function() { self._scrollPage(); }, 200 );
}if( self.itemsRenderedCount === self.itemsCount ) {
window.removeEventListener( 'scroll', onScrollFn, false );
}}// animate the items inside the viewport (on scroll)window.addEventListener( 'scroll', onScrollFn, false );
// check if new items are in the viewport after a resizewindow.addEventListener( 'resize', function() { self._resizeHandler(); }, false );
});
}
注意我们创建了一个函数 GridItem 来控制每一张图片的数据和方法。当 curtain 元素被创建,我们设置它的背景色,背景色将被设置为图片的主导色,这可以通过 Colorfinder 插件来实现。
function GridItem( el ) {
this.el = el;
this.anchor = el.querySelector( 'a' )
this.image = el.querySelector( 'img' );
this.desc = el.querySelector( 'h3' );
}GridItem.prototype.addCurtain = function() {
if( !this.image ) return;
this.curtain = document.createElement( 'div' );
this.curtain.className = 'curtain';
var rgb = new ColorFinder( function favorHue(r,g,b) {
// exclude white//if (r>245 && g>245 && b>245) return 0;return (Math.abs(r-g)*Math.abs(r-g) + Math.abs(r-b)*Math.abs(r-b) + Math.abs(g-b)*Math.abs(g-b))/65535*50+1;
} ).getMostProminentColor( this.image );
if( rgb.r && rgb.g && rgb.b ) {
this.curtain.style.background = 'rgb('+rgb.r+','+rgb.g+','+rgb.b+')';
}this.anchor.appendChild( this.curtain );
}GridItem.prototype.changeAnimationDelay = function( time ) {
if( this.curtain ) {
this.curtain.style.WebkitAnimationDelay = time + 'ms';
this.curtain.style.animationDelay = time + 'ms';
}if( this.image ) {
this.image.style.WebkitAnimationDelay = time + 'ms';
this.image.style.animationDelay = time + 'ms';
}if( this.desc ) {
this.desc.style.WebkitAnimationDelay = time + 'ms';
this.desc.style.animationDelay = time + 'ms';
}}
现在让我们来看看滚动鼠标时会发生什么。首先,程序迭代所有的图片,看看那些已经在屏幕中出现,那些还没有出现。如果一张图片没有 curtain,那么就添加一个 class shown 并返回。否则就添加 class animate 来触发动画。当动画结束,就添加 class shown 并去掉 class animate。
GridScrollFx.prototype._scrollPage = function() {
var self = this;
this.items.forEach( function( item ) {
if( !classie.has( item.el, 'shown' ) && !classie.has( item.el, 'animate' ) && inViewport( item.el, self.options.viewportFactor ) ) {
++self.itemsRenderedCount;
if( !item.curtain ) {
classie.add( item.el, 'shown' );
return;
};
classie.add( item.el, 'animate' );
// after animation ends add class shownvar onEndAnimationFn = function( ev ) {
if( support.animations ) {
this.removeEventListener( animEndEventName, onEndAnimationFn );
}classie.remove( item.el, 'animate' );
classie.add( item.el, 'shown' );
};
if( support.animations ) {
item.curtain.addEventListener( animEndEventName, onEndAnimationFn );
}else {
onEndAnimationFn();
}}});
this.didScroll = false;
}
当调整了显示窗口的大小,我们需要检查图片是否在可视区域。
GridScrollFx.prototype._resizeHandler = function() {
var self = this;
function delayed() {
self._scrollPage();
self.resizeTimeout = null;
}if ( this.resizeTimeout ) {
clearTimeout( this.resizeTimeout );
}this.resizeTimeout = setTimeout( delayed, 1000 );
}
| 演示地址 | 下载地址 |
专业提供WordPress主题安装、深度汉化、加速优化等各类网站建设服务,详询在线客服!
也想出现在这里?联系我们吧